Please notice that this is the accompanying page and resources to the series of videos of the course. To have access to the videos please buy or rent the course here.
Let’s get straight to it.
First, you need to understand the basics of what we’re going to be doing, we’re building a flying machine, and we’re going to control it with radio signals instead of being sitting inside it. You don’t need to be an engineer or do complex math to make this project, but a basic understanding of how things work will help.
Some topics I recommend you to study while making this course are:
- Basic Aerodynamics
- Center of Gravity for Airplanes
- Control Surfaces
- Basic Electronic Components for RC Aircraft
To learn about aerodynamics I recommend getting a book called Model Aircraft Aerodynamics by Martin Simons, although you won’t need deep knowledge of aerodynamics to complete this project it can help you in the future with your own creations if you want to take this seriously.
The center of gravity is something that we’ll be explaining during the build process towards the end, it’s a very simple concept about the balance of the airplane.
The control surfaces are the parts that control the aircraft in flight, I’ve made a video on YouTube explaining that but you can watch it here and understand the basics.
The electronic components are going to be explained in this course, but we’ll only cover the set up we need to complete this project in particular, this set up will be the most common since most RC airplanes are wired similarly.
This is a simple 3 questions test to show some basic but important understanding of the control of the airplane, this is related to the video about control surfaces
What you need
Materials and Tools:
- x2 sheets of foam board of 5mm, size A1, or 3 sheets of size A2, you can use a similar material such as XPS foam. Other foams are known with the names: BlueCor, Readi-Board, Depron, and Fli-Power XPS. Make sure to get one close to 5 mm in thickness.
- 2-3 mm thick plywood, enough to make the motor base, center spar, and other reinforcements.
- The recommended glue: Hot glue gun. Other glues work too, avoid using aggressive adhesives with foam such as CA.
- BBQ skewers.
- Sharp hobby knife.
- Pliers and wire cutters.
- Landing gear: 2mm steel wire (1 meter in length) and wheels from 50mm to 80mm, you can buy a separate already made landing gear.
- Soldering iron and tin.
- Ruler (preferably metallic).
- Paint and elements to decorate your model plane.
Electronic Components:
- 2206 or similar motor with 1600KV – 2600KV.
- 5 “- 7” propeller (use the one recommended by the motor manufacturer).
- Recommended battery for beginners and stable flights: 2S from 2200 – 4000 mAh. (Do not fly on windy days with this configuration). For more power: 3S from 1500 – 3200 mAh. (You can fly on a bit windy days and do maneuvers).
- X4 micro servos.
- ESC of 30A with BEC.
- Radio and receiver of a minimum of 4 channels.
- X4 20 cm servo extensions.
- Connectors you’re going to be using (if needed).
Watch the video for more details.
Connecting the Electronics
This is a step we are going to do after the airplane is built, but let’s take a look at this process because it’s actually simple.
Note: Radio software configuration will be explained in detail later, so don’t worry about the radio now.
Here’s a diagram that shows the connections in a simple way, of course, the servos have to be connected to the right channels, remember that the ESC should have a BEC, SBEC or UBEC to provide the voltage to the receiver and servos, if you buy an ESC with no BEC then you’ll need to provide around 5v with a separate battery, or BEC. The ESCs that say “OPTO” won’t have any voltage regulators, so don’t buy them for this project.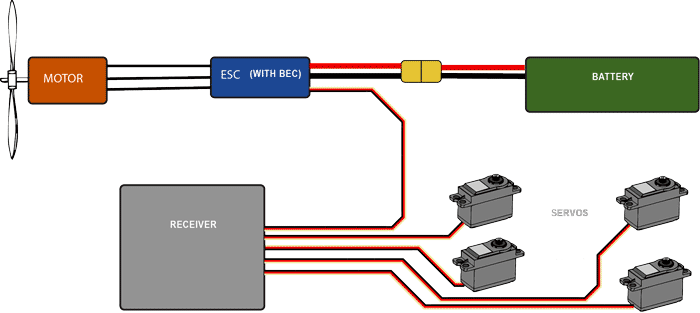
Building the Airplane
About the landing gear
The landing gear needs to be very strong if you plan to use it, as mentioned before it needs to be a 2mm steel wire, it can also be 1.5 mm, but it might be too weak. There are several ways to make and attach the landing gear to this model, in the images below you’ll see two possible configurations.
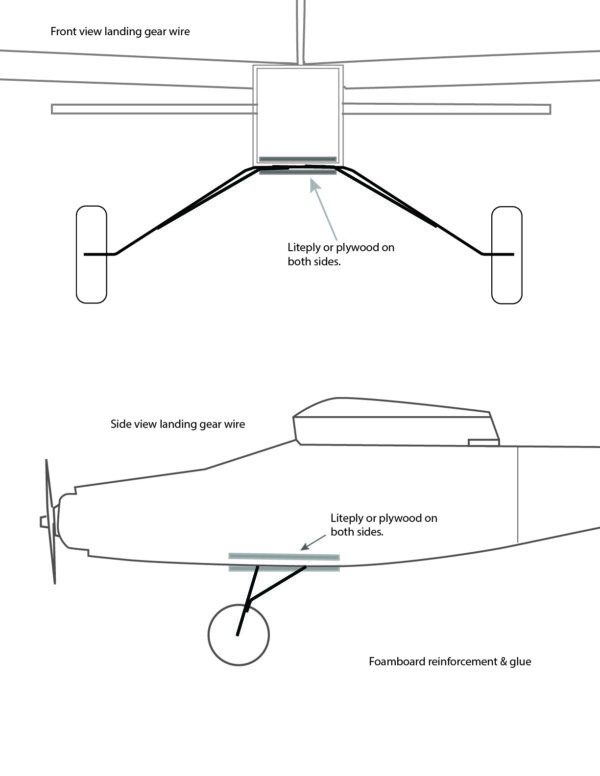
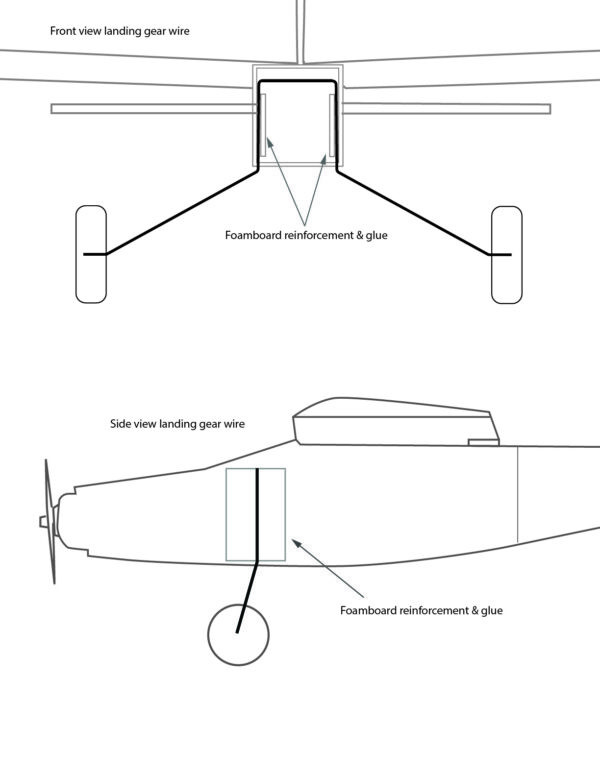
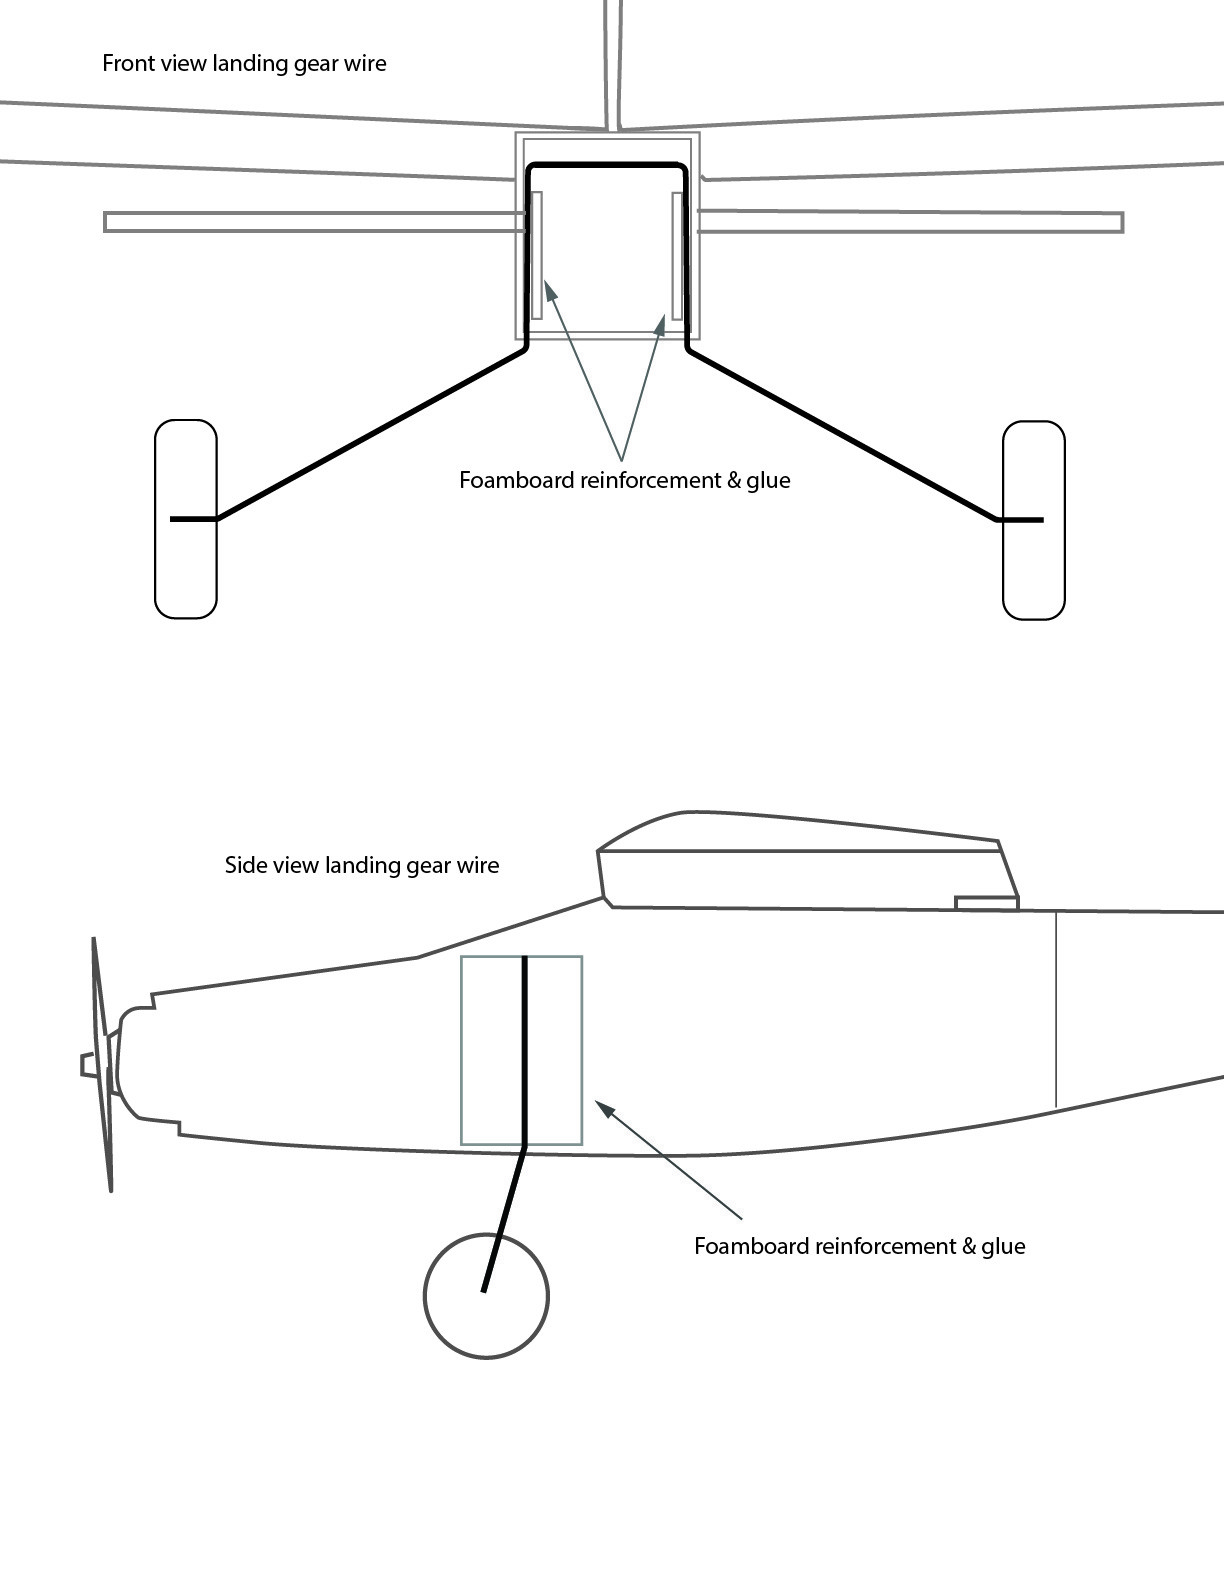
Radio Software Set-up
If you use Open TX you can check this link
Radios have a range of about 1 Km but this depends on the brand, quality of the radio, environmental factors, and the receiver you use, but let’s say that on average they should all have a maximum range of 1 Km, don’t expect the FlySky i6 reach that far, but in proper conditions, it can. You don’t need a long-range radio since at 600 meters the model will already be very small to distinguish the direction it is going, and you can lose it very quickly.
Bonus Tips
Installing and Using a Flight Simulator
To start learning to Fly you can use a free RC Flight Simulator, it’s called PicaSim and you can visit its official website here Download it and install it on your PC. You need to connect your radio to your PC via its USB port in the case of many modern radio systems, or by using an adapter like this one. There are other ways to connect a radio to your PC as shown in an old video from our channel which you can watch here.
If you have problems with your USB radio and Windows, it might be a driver issue, the problem can be easily fixed following this video
Once everything is working now you can use your PicaSim RC simulator and practice, or buy any other RC simulator to sharpen your piloting skills.